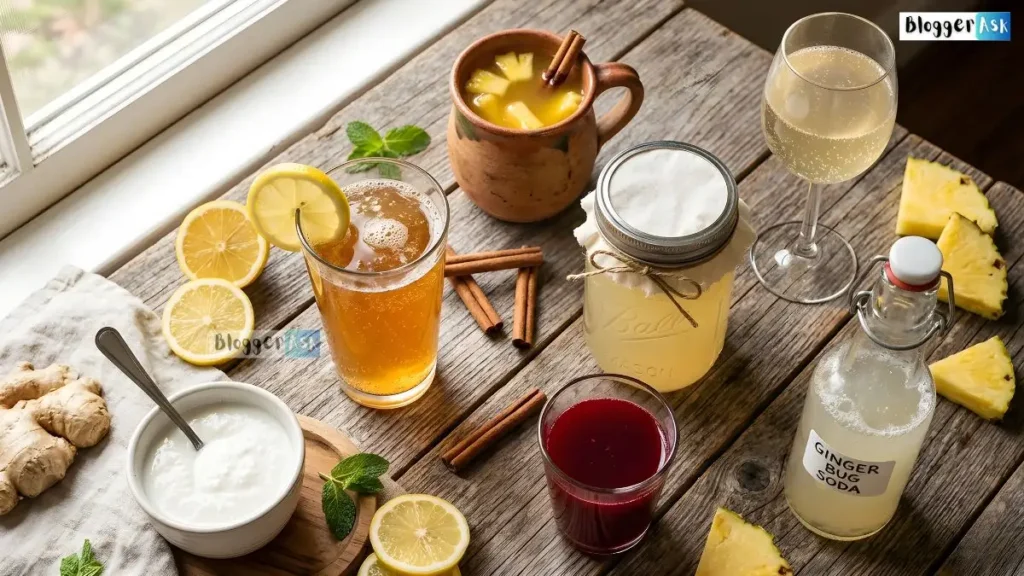
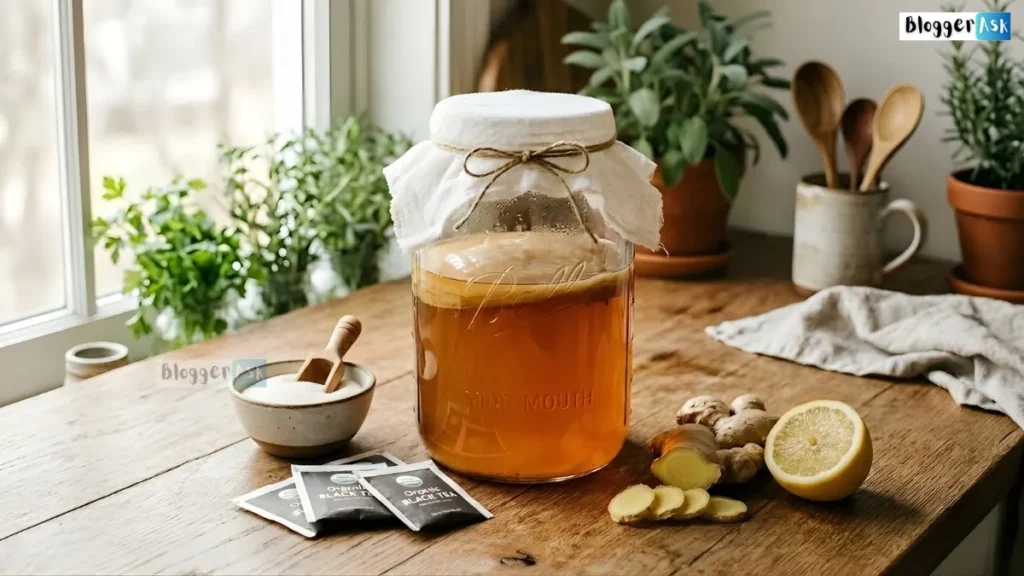
Kombucha is made by fermenting sweetened black tea with a SCOBY and starter liquid for 7–14 days at room temperature (70–78°F). Use plain black tea, white sugar, and 1–2 cups of starter liquid to safely lower pH and prevent contamination. Most homemade kombucha is ready to bottle around days 8–10 depending on temperature and taste preference.
5 steps: Brew sweet tea → Cool completely → Add starter + SCOBY → Cover and ferment → Taste from Day 7, bottle when tart.
The first time I made kombucha at home, I nearly poured it down the sink. The SCOBY looked wrong. The smell was sharp. I had no idea whether what was happening inside that jar was fermentation or catastrophe. That batch turned out perfectly — and cost me less than fifty cents to make.
Four years and several hundred batches later, I can tell you kombucha is one of the most forgiving fermentation projects a beginner can try. This guide gives you the complete 2026 picture: the recipe, the research, the troubleshooting, the safety, and every mistake worth avoiding.
What Is Kombucha?
Kombucha is a fermented tea beverage made by adding a SCOBY — Symbiotic Culture of Bacteria and Yeast — to sweetened tea and letting it ferment at room temperature for 7–14 days. The SCOBY consumes most of the sugar during fermentation and produces organic acids, B vitamins, trace amounts of alcohol (typically 0.2–0.5% ABV), and live bacterial cultures.
Think of a SCOBY the same way you would a sourdough starter — a living culture you feed and reuse batch after batch. The flavor ranges from gently tart (days 7–9) to dry and vinegary (days 12–14), depending on fermentation time and temperature.
Kombucha has been brewed across cultures for over 2,000 years. Its earliest documented origins trace to northeast China, where it was called the “Tea of Immortality,” before spreading through Russia and Eastern Europe along trade routes.
Most batches in this guide were brewed in a 72–76°F kitchen using filtered tap water, plain Assam black tea bags, and the batch fermentation method across multiple SCOBY generations spanning four years. Every tip here reflects what actually worked — and what didn’t.
Kombucha Health Benefits — What the 2024–2025 Research Says
Kombucha is not a cure for anything. The research is still maturing. Here is where things actually stand as of mid-2026:
Gut Microbiota
A 2024 controlled clinical trial in Scientific Reports (UC San Diego) found four weeks of daily kombucha increased the abundance of Weizmannia coagulans and several short-chain fatty acid-producing bacteria. A 2025 trial in The Journal of Nutrition found black tea kombucha positively shifted gut bacteria over 8 weeks, with stronger effects in participants with obesity. A June 2025 systematic review in Fermentation (MDPI) analyzed eight clinical trials and concluded kombucha shows a “modest capacity for modulating gut and salivary microbiota” — promising but heterogeneous evidence that requires larger trials to confirm.
Blood Sugar Response
A 2023 pilot RCT in Frontiers in Nutrition found kombucha reduced post-meal glucose responses in adults with type 2 diabetes. A University of Sydney crossover study found kombucha lowered the glycemic index of a high-GI meal from 86 to 68. Encouraging, but small sample sizes limit conclusions.
Antioxidants & Polyphenols
A 2025 analysis identified 145 phenolic compounds in finished kombucha — primarily flavonoids that survive the fermentation process. These are associated with antioxidant activity in well-established tea research.
Kombucha shows real biological activity in human trials, but most studies are still small and short. Drink it as part of a varied diet — not as a treatment for any health condition.
Medical Disclaimer: Kombucha is a food, not a medicine. If you have gut disorders, diabetes, liver disease, a compromised immune system, or are pregnant or breastfeeding, consult your doctor before consuming it regularly. The FDA advises kombucha is generally safe for healthy adults at up to 4 oz per day. Marie Roberts is a home brewer and wellness writer — not a clinician.
Equipment & Ingredients (1-Gallon Batch)
Equipment Checklist
- 1-gallon wide-mouth glass jar (Mason jar works well)
- Large pot for boiling and cooling tea
- Breathable cloth cover — tightly woven cheesecloth, coffee filter, or clean cotton
- Rubber band to secure the cover
- Wooden or silicone spoon — no metal near the SCOBY
- Swing-top glass bottles (16 oz) for second fermentation
- Fine-mesh strainer and funnel for bottling
- pH strips (optional — target pH 2.5–4.2 at bottling)
Equipment Safety Note
Glass, silicone, and wood only. Metal reacts with kombucha’s acids. Uncoated ceramic crocks may leach toxins into acidic brews. Rinse all equipment twice after washing — even faint soap residue disrupts fermentation.
Ingredients
| Ingredient | Amount | Notes |
| Filtered water | 1 gallon | Chlorine in tap water inhibits the SCOBY — filter or let sit 24 hrs |
| Plain black tea bags | 4–6 bags | No herbal, flavored, or oily teas for first batch |
| White granulated sugar | 1 cup (200 g) | Do not sub honey, maple syrup, or artificial sweeteners yet |
| SCOBY disc | 1 disc | See sourcing options below |
| Starter liquid | 1–2 cups | Raw, unflavored kombucha — previous batch or store-bought |
On sugar: The SCOBY consumes most of it during fermentation. A 10-day batch contains significantly less residual sugar than a 7-day batch. Longer fermentation = less sweetness and less sugar. The sugar is food for the SCOBY — not for you.
On honey: Avoid honey in early batches. It contains antimicrobial compounds that can inhibit the SCOBY’s bacterial cultures. Once experienced, some brewers use raw honey successfully — but it requires process adjustment.
Best Tea Types for Kombucha
Tea choice directly affects fermentation reliability, SCOBY health, and final flavor. Not all teas work equally well — especially for beginners.
| Tea Type | Beginner Friendly? | Flavor Profile | Notes |
|---|---|---|---|
| Black Tea | Best option | Strong, reliable, robust | Highest tannin content feeds SCOBY best. Use for first 3+ batches. |
| Green Tea | After 3+ batches | Lighter, grassy, delicate | Works well once SCOBY is established. Lower caffeine. |
| White Tea | Advanced only | Very delicate, floral | Low tannins — fermentation can be slow and unpredictable. |
| Oolong Tea | Intermediate | Floral, complex | Between black and green. Works, but not ideal for beginners. |
| Herbal Tea | Not recommended | Varies widely | Oils, additives, and lack of tannins can damage or kill the SCOBY. |
| Earl Grey / Flavored | Never | N/A | Bergamot oil is antimicrobial — harmful to the culture. |
Blending Teas
Once comfortable, blending 75% black tea + 25% green tea gives a balanced flavor — reliable fermentation with a lighter taste. Many experienced home brewers use this combination as their standard base.
How to Get a SCOBY
- Buy a starter kit online or at a health food store — includes SCOBY and starter liquid. Easiest for beginners. Cost: $10–20.
- Get one from a brewer you trust — every batch grows a new SCOBY layer. Most experienced brewers have extras. Check r/kombucha or local fermentation groups — often free.
- Grow your own from raw, unflavored store-bought kombucha — combine one bottle with cooled sweet tea in a glass jar. Cover with cloth at 70°F+. A thin disc forms in 1–4 weeks. Cheap but slow.
To grow a SCOBY from store-bought kombucha, the bottle must be raw (unpasteurized) and completely unflavored. Pasteurized kombucha has no live cultures. Flavored versions often contain additives that prevent disc formation.
Homemade Kombucha Recipe
Homemade Kombucha (1-Gallon Batch)
A beginner-friendly fermented tea recipe using black tea, sugar, SCOBY, and starter liquid — brewed safely over 7–14 days at room temperature.
Ingredients
- 1 gallon filtered water
- 4–6 plain black tea bags
- 1 cup (200 g) plain white granulated sugar
- 1 SCOBY disc
- 1–2 cups raw, unflavored kombucha starter liquid
Quick Steps
- Steep 4–6 black tea bags in 4 cups boiling water for 10–15 min. Dissolve 1 cup sugar. Add cool water to reach 1 gallon. Cool to below 80°F.
- Pour 1–2 cups starter liquid into a clean 1-gallon glass jar first.
- Add SCOBY. Pour in cooled sweet tea. Leave 1–2 inches headspace.
- Cover with breathable cloth + rubber band. Store in a warm spot (70–78°F), away from sunlight.
- Taste daily from Day 7. Bottle when pleasantly tart. Reserve 1–2 cups as next starter.
Estimated Nutrition — Per 8 oz (240 ml) Serving
Values vary by fermentation length, tea type, and sugar added. Longer fermentation = fewer calories and less sugar. These are estimates — home brewing does not allow precise measurement without lab testing.
Step-by-Step Brewing Instructions
Brew and Cool Sweet Tea
Boil 4 cups of filtered water. Steep 4–6 plain black tea bags for 10–15 minutes. Remove bags — do not squeeze them (releases bitter tannins). Stir in 1 cup of white sugar until fully dissolved. Add remaining cool filtered water to reach 1 gallon.
Non-negotiable: Cool completely to below 80°F before the SCOBY touches it. Hot tea kills the culture. Brewing in the evening and letting it sit overnight is the simplest method.
Add Starter Liquid First
Pour 1–2 cups of raw starter liquid into your clean jar before anything else. This drops the pH immediately, creating an acidic environment that blocks contamination during the critical early hours.
Per FDA food guidance, reaching pH 4.2 or below within seven days is the key safety threshold — starter liquid is how you get there fast. Never skip this step.
Add SCOBY and Cooled Tea
With clean, unscented hands, lower the SCOBY into the jar. Pour in the fully cooled sweet tea.
Leave 1–2 inches of headspace. The SCOBY may float, sink, tilt, or break apart — all normal. A new pellicle layer forms on the surface regardless of what the original SCOBY does.
Cover and Ferment
Secure a breathable cloth cover with a rubber band. Never use a solid lid — the SCOBY needs airflow and CO₂ must escape.
Label the jar with the start date. Place in a consistently warm spot (70°–78°F) away from direct sunlight and strong odors. Do not move or shake the jar.
Taste-Test Daily from Day 7
Slip a clean straw under the SCOBY disc to pull a small sample.
- Very sweet? Ferment 2–3 more days.
- Pleasantly tart, light fizz? Ready to bottle.
- Strongly sour, vinegary? Over-fermented — save as starter liquid.
Bottle and Start Your Next Batch
Remove SCOBY with clean hands. Reserve 1–2 cups finished kombucha as your next starter.
Pour the rest through a fine-mesh strainer into clean glass bottles. Seal. Refrigerate for still kombucha, or proceed to second fermentation for fizz.
During my first 10 batches, I made almost every mistake possible. I added the SCOBY to tea that was still warm — fermentation stalled completely. I skipped starter liquid once — mold appeared within four days. I overfilled second-fermentation bottles — one cracked under pressure.
I tried Earl Grey tea in batch 6 — the bergamot oil visibly weakened the SCOBY over the next three batches.
These mistakes taught me that kombucha brewing is less about perfection and more about four things: cleanliness, temperature control, patience, and never skipping starter liquid.
Second Fermentation — How to Carbonate Your Kombucha
First fermentation makes kombucha. Second fermentation (F2) makes it bubbly. Optional — but the carbonation changes the drink significantly.
- Fill swing-top bottles leaving 1 inch of headspace.
- Add per 16 oz bottle: 1 tsp plain sugar + your chosen flavoring.
- Seal tightly. Leave at room temperature (70–75°F) for 2–4 days.
- Burp daily — crack the seal briefly to release pressure, then reseal.
- Refrigerate for at least 12 hours before opening — stabilizes bubbles.
Never skip daily burping during F2. CO₂ buildup in sealed bottles can shatter glass. Use proper swing-top bottles rated for carbonated beverages. If a bottle feels very firm before day 2, refrigerate it immediately.
Kombucha Flavor Ideas for Second Fermentation
Add flavoring only during second fermentation — never during the first fermentation with the SCOBY. Fruit sugars and additives can harm the culture and contaminate your SCOBY for future batches. Add per 16 oz bottle before sealing.
Classic Ginger Lemon
3–4 thin ginger slices + squeeze of lemon. Most reliable starter flavor — consistent carbonation.
Blueberry Mint
8–10 frozen blueberries + 3–4 fresh mint leaves. Vibrant color, refreshing taste.
Strawberry Basil
2 tbsp fresh strawberry chunks + 2 small basil leaves. Floral and fruity.
Pineapple Ginger
2 tbsp pineapple chunks + 2 thin ginger slices. Tropical, high carbonation.
Apple Cinnamon
2 tbsp apple juice + a small cinnamon stick. Warm, autumn-style flavor.
Mango Chili
2 tbsp mango puree + a pinch of chili flakes. Unexpected but addictive.
Carbonation Control by Flavoring Type
Whole fruit pieces and fresh ginger: slower, more controlled carbonation. Fruit juices and purees: faster, higher pressure — burp these more frequently. Start with 1 tbsp of any new flavoring per 16 oz and adjust from there.
Brewing Timeline — Day by Day
Temperature is the primary variable controlling fermentation speed. At 72–74°F most batches are drinkable by days 8–10. At 65°F the same result takes 12–16 days.
pH as a Safety Checkpoint
Target pH 2.5–4.2 at bottling. Reaching pH 4.2 within 7 days is the FDA Food Code safety threshold — the point at which most harmful organisms cannot survive. Optional pH strips make this easy to verify.
Seasonal Brewing Guide
Kitchen temperature changes dramatically by season and this changes everything about your brew timeline. The same batch that takes 8 days in July may take 14 days in January.
| Season | Typical Kitchen Temp | Expected Fermentation Time | Practical Tip |
|---|---|---|---|
| Summer | 75–82°F (24–28°C) | 6–9 days | Taste from day 6 — it brews fast. Risk of over-fermentation if you forget to check. |
| Spring / Fall | 70–74°F (21–23°C) | 8–11 days | Ideal brewing season. Consistent results with minimal adjustment needed. |
| Winter | 62–68°F (17–20°C) | 12–18 days | Place jar on top of the refrigerator — the motor produces steady warmth (typically 72–75°F). Game changer. |
| Very Hot (>85°F) | 85°F+ | 5–7 days, risky | Move to a cooler room. Excess heat stresses the SCOBY and produces off-flavors. Never above 88°F. |
Winter Brewing Trick
In cold kitchens, wrap the jar in a clean towel and place it on top of the refrigerator. This is the most common solution experienced home brewers use — and it genuinely works. The refrigerator’s compressor generates consistent warmth that maintains 72–75°F even when the ambient room is 65°F.
Safety: Healthy SCOBY vs Mold — Complete Visual Guide
When brewed correctly with starter liquid and clean equipment, kombucha is reliably safe. The FDA has confirmed that properly prepared kombucha presents no pathogenic organisms once pH drops to 4.2 within the first seven days. The most common beginner fear — mold — is easily distinguished from normal SCOBY appearance once you know what to look for.
| Feature | ✅ Healthy SCOBY | 🚫 Mold |
|---|---|---|
| Texture | Smooth, rubbery, wet | Fuzzy, dry, raised |
| Color | Cream, tan, brown, gray — any of these are fine | Green, black, pink, blue, or orange patches |
| Surface appearance | Continuous disc, may have uneven edges | Circular powdery or fuzzy spots |
| Floating bits in liquid | Brown stringy yeast strands — completely normal | Fuzzy particles near the surface — discard |
| Smell | Sharp, vinegary, lightly sweet | Rotten, cheese-like, putrid |
| SCOBY edges | May be irregular, holey, or multi-layered — fine | Powdery white or colorful growth on edges — mold |
| Action required | Continue brewing normally | Discard everything immediately — SCOBY and all liquid |
Signs of a Healthy Batch
- Sharp, vinegary smell with faint sweetness
- Smooth cream-to-beige disc on surface
- Brown stringy bits in liquid (yeast strands)
- Small bubbles along jar walls
- New thin SCOBY layer forming on top
Discard Entire Batch If You See:
- Fuzzy green, black, pink, or orange growth
- Mold on the cloth cover or jar rim
- Rotten, cheese-like, or putrid smell
- SCOBY dissolving into slime
- Dry, powdery spots anywhere in jar
Fuzzy = mold. Smooth, any color, is almost always fine.
If you see mold, discard everything — SCOBY, liquid, all of it. No batch can be saved once contaminated.
Who Should Avoid Kombucha
The FDA advises against regular kombucha consumption without medical clearance for: pregnant or breastfeeding women (trace alcohol + unpasteurized), young children, people with compromised immune systems, and individuals with liver disease or severe gastrointestinal conditions.
Common Kombucha Brewing Mistakes
“The SCOBY doesn’t need your help. It needs a warm shelf and your patience. Every time I interfered before it was time, I made the batch worse.”
| Mistake | Why It’s a Problem | The Fix |
|---|---|---|
| SCOBY added to warm tea ⭐ | Heat above 85°F kills the culture | Brew the night before; wait for complete cooling |
| Skipping starter liquid ⭐ | pH stays high → contamination risk doubles | Always use 1–2 cups raw kombucha. Non-negotiable. |
| Solid lid on first fermentation | Blocks airflow; CO₂ cannot escape; may crack jar | Breathable cloth + rubber band only |
| Flavored or herbal tea for batch 1 | Oils and additives inhibit or kill the SCOBY | Plain black tea only for first 3 batches |
| Cold fermentation spot | Fermentation stalls below 65°F; mold risk increases | Top of refrigerator maintains 72–75°F reliably |
| Moving or shaking the jar | Disrupts new pellicle formation | Set it and forget it — leave completely undisturbed |
| Tasting before Day 7 | Tastes like sweet tea — falsely triggers panic | Set a calendar reminder for Day 7 and wait |
| Using metal equipment | Acids react with metal, introducing off-flavors | Glass, silicone, and wood only at every stage |
| Skipping daily burping in F2 | CO₂ builds to dangerous pressure levels | Burp every bottle once per day without fail |
| Using tap water without filtering | Chlorine inhibits bacterial cultures in SCOBY | Filter water or let tap water sit uncovered 24 hrs |
Kombucha Troubleshooting — Quick Fixes
Most kombucha problems have straightforward fixes. The key is diagnosing the symptom correctly before taking action.
| Problem | Likely Cause | Fix |
|---|---|---|
| Kombucha too sweet after Day 10 | Kitchen too cold or weak starter liquid | Move jar to warmer location; extend fermentation 2–3 days |
| Kombucha too sour / vinegary | Fermented too long | Bottle earlier on next batch. Use this batch as premium starter liquid. |
| Flat kombucha after F2 | Insufficient sugar, too short F2 time, or bottles not sealed | Add 1 more tsp sugar, extend F2 by 1–2 days, check seals are tight |
| Explosive carbonation | Too much sugar in F2 or too long at room temp | Reduce sugar to ½ tsp per 16 oz; refrigerate sooner |
| No SCOBY growth after 7 days | Tea too warm when SCOBY was added, or weak starter | Check temperature; a thin new layer is normal even if barely visible |
| SCOBY is very thin and transparent | Normal for new batches and colder temperatures | No action needed — it thickens over successive batches |
| Brown stringy bits floating | Yeast strands — completely normal byproduct | No action needed. Strain when bottling if preferred. |
| Kombucha smells like alcohol | Over-fermented or temperature too high | Bottle immediately. Reduce fermentation time on next batch. |
| Fermentation stalled completely | Kitchen below 65°F, chlorinated water, or dead SCOBY | Warm up the brew location. If no change after 3 more days, restart with fresh starter. |
| Off-flavors (musty, sulfur, metallic) | Metal contact, soap residue, or wrong tea type | Rinse equipment more thoroughly. Check for any metal contact. Use plain black tea. |
Signs Fermentation Has Stalled
No tartness after 10 days, no SCOBY growth, no bubbles at all, and still very sweet — these together indicate a stall. First check: is the location above 68°F? If yes, check starter liquid quality. Fresh, recently brewed starter (not old, refrigerated kombucha) produces significantly more reliable results.
Batch Brewing vs Continuous Brewing
There are two main methods for home brewing kombucha. Most beginners start with batch brewing — and that is the right choice.
Batch Brewing
- Make one gallon at a time
- Empty vessel completely between batches
- Easiest contamination control
- Simple equipment — just a jar
- Best for learning the process
- Easiest to troubleshoot
- Recommended for all beginners
Continuous Brewing
- Permanent vessel, always fermenting
- Draw off kombucha and add new sweet tea regularly
- Faster once established (3–5 days per cycle)
- Requires dedicated vessel with spigot
- More monitoring needed
- Harder to troubleshoot problems
- Best for frequent drinkers after 10+ batches
Continuous brewing produces kombucha faster once the method is mastered, but it makes diagnosing problems significantly harder. If anything goes wrong — contamination, off-flavors, SCOBY degradation — the cause is harder to isolate. Do not start continuous brewing until batch brewing is fully reliable for you.
How to Store Kombucha
Finished Kombucha
Refrigerate in sealed glass bottles. Best within 2–4 weeks for flavor; drinkable for up to 3 months. Flavor continues to sharpen in cold storage — taste it periodically and consume when it suits you.
SCOBY Hotel (Between Batches)
Store your SCOBY in a glass jar with 1–2 cups of starter liquid, covered with cloth at room temperature. This is called a SCOBY hotel. Feed with a splash of fresh sweet tea every 4–6 weeks if not actively brewing. Refrigerate if pausing for more than one month — bring back to room temperature 24–48 hours before your next batch.
Starter Liquid
Always keep 1–2 cups in reserve in your SCOBY hotel jar. It is the foundation of every future batch. Losing it means sourcing fresh raw store-bought kombucha to restart. Treat it like a sourdough starter — do not let it run dry.
Long-Term Cost Perspective
A single SCOBY, maintained correctly, lasts years and produces hundreds of batches. After the initial $10–20 purchase, each 1-gallon batch costs $0.30–0.60 in tea, sugar, and water. Store-bought kombucha runs $3–5 per 16 oz bottle. Home brewing a gallon saves approximately $20–35 per batch compared to retail — a $10 SCOBY investment pays back after a single batch.
Frequently Asked Questions
How long does it take to make kombucha at home?
First fermentation: 7–14 days. Second fermentation (optional): 2–4 more days. Most batches are ready to drink in 10–18 days total, with day 9–11 being the sweet spot at average room temperature.
What temperature should kombucha ferment at?
70–78°F (21–26°C) is ideal. Below 65°F, fermentation slows dramatically or stalls. Above 85°F, it can stress the culture and produce off-flavors. Consistent temperature matters more than hitting an exact number.
How do I know when kombucha is done fermenting?
Taste it from day 7. It’s ready when it’s pleasantly tart with mild residual sweetness and a light natural fizz — enjoyable to sip, not sharp enough to make you wince. If it still tastes like sweet tea, ferment 2–3 more days.
How do I know if kombucha has gone bad?
Fuzzy colored mold on the SCOBY or a rotten, cheese-like smell means discard the entire batch. A healthy batch smells sharp and vinegary. When in any doubt, throw it out — no single batch is worth the risk.
Is homemade kombucha safe during pregnancy?
Most healthcare providers advise caution or avoidance due to the small alcohol content, unpasteurized nature, and caffeine from the tea. Speak with your OB before drinking it during pregnancy.
Can I make kombucha without sugar?
No — the SCOBY’s food source is sugar. Without it, fermentation doesn’t happen. Most sugar is consumed during fermentation, so the finished drink contains far less than what you added.
What’s the difference between first and second fermentation?
First fermentation (F1) turns sweet tea into kombucha in an open, breathable jar over 7–14 days. Second fermentation (F2) builds carbonation by sealing the bottled kombucha with a small sugar addition for 2–4 days. F1 makes the drink; F2 makes the fizz.
All health-related claims reference peer-reviewed research or official regulatory sources. Studies cited where specific data is used. Preliminary findings are noted as such.
- Ecklu-Mensah G et al. (2024). Modulating the human gut microbiome through kombucha consumption. Scientific Reports. PubMed Central ↗
- Costa MA et al. (2025). Regular Consumption of Black Tea Kombucha Modulates the Gut Microbiota in Individuals with and without Obesity. Journal of Nutrition.
- Mendelson C et al. (2023). Kombucha tea as an anti-hyperglycemic agent: randomized controlled pilot study. Frontiers in Nutrition. PubMed ↗
- MDPI Fermentation (June 2025). Benefits of Kombucha Consumption: A Systematic Review of Clinical Trials. MDPI ↗
- Fraiz GM et al. (2024). Impact of Green Tea Kombucha on Gut Microbiota and Serum Metabolome. Foods. PubMed Central ↗
- Nummer BA. (2013). Kombucha Brewing Under the FDA Model Food Code: Risk Analysis. Journal of Environmental Health. ResearchGate ↗
- Colorado State University Food Source Information. (2024). Kombucha — FDA Safety Guidance. CSU ↗
- U.S. TTB. Kombucha Information and Resources. TTB.gov ↗
- Esatbeyoglu T et al. (2023). Additional advances in kombucha health benefits. Critical Reviews in Food Science and Nutrition.
- Kombucha Brewers International. Code of Practice for Kombucha Production. KBI ↗

With a strong interest in fitness and preventive wellness, I focus on sustainable habits rather than quick solutions. I write evidence-based content on nutrition, exercise, and mental well-being to support long-term healthy living.